I recently moved my hoard of data from various NAS devices to a consolidated VM running TrueNAS. After some research, I decided to use Proxmox as the host OS. Aside from it being open-source, it has several features I like the look of, including native support for Linux Containers (LXC). I’ve decided that the first LXC that I create is going to be a Pi-Hole server and I’m going to document the process here. This article is slightly off-topic so I’m going to briefly describe a few concepts that may not be familiar to every datahoarder. If you are familiar with these concepts, of course, skip ahead.
What is a Linux Container?
Linux containers are a little like virtual machines except that they share the Linux kernel with the host. This makes them very lightweight but also means they can only run Linux guests. Proxmox includes a number of Linux templates, any of which can be used to create a new container that’ll share the Linux kernel that’s powering the Proxmox host itself.
What is Pi-Hole?
Pi-Hole is an ad-blocking application that, as its name suggests, was originally developed to run on a Raspberry Pi single-board computer. It has since been updated to run on other Linux machines, including virtual machines/containers. Today, I’ll be installing Pi-Hole inside a Debian Linux container. Pi-Hole is a DNS server that listens for and responds to DNS requests. Unlike a traditional DNS server, before Pi-Hole responds to the requests, it consults a blacklist. If the hostname being looked up is on the blacklist, Pi-Hole will not proceed with the lookup. You can load a blacklist containing the hostnames of ad-servers and the ads won’t be able to load.
Step 1 – Create a new container for Pi-Hole.
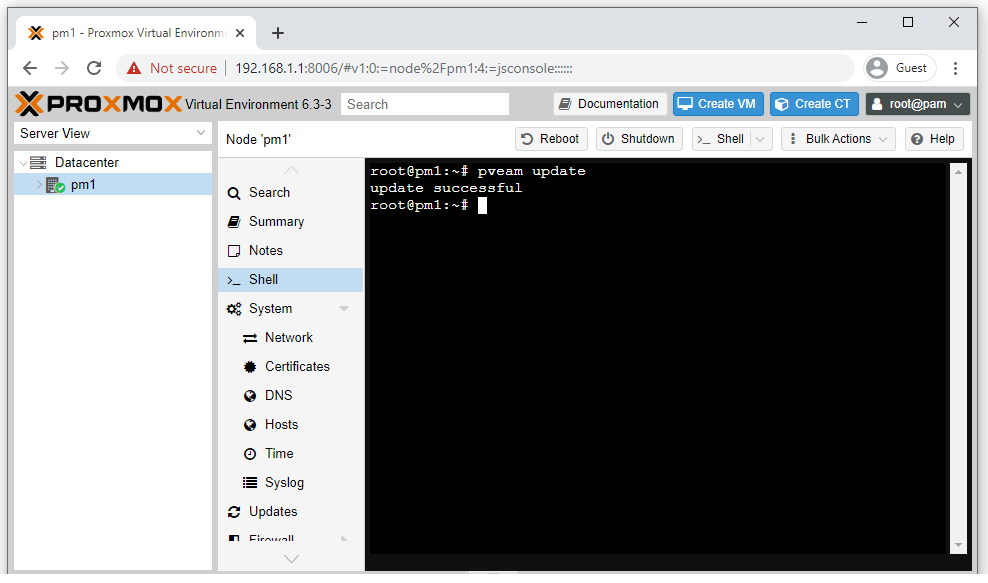
Firstly, you’ll want to update your list of available containers. To do this, click on your Proxmox node and then click “Shell”. This will open up your node’s command-line shell for you to enter instructions into. Simply type “pveam update” and hit Enter. The process should complete within a few seconds.
Click on your local node’s storage object, then click “CT Templates” and then “Templates”. This will display all the available templates to download. I’m going to use Debian because I’m most familiar with this distro. If you prefer Ubuntu for example. then select that instead. Finally, click “Download” and wait for the template to be downloaded from the Internet. Debian is a couple of hundred MB’s so will only take a minute for me.
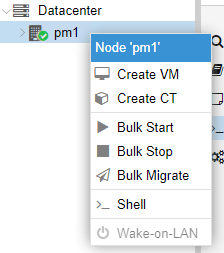
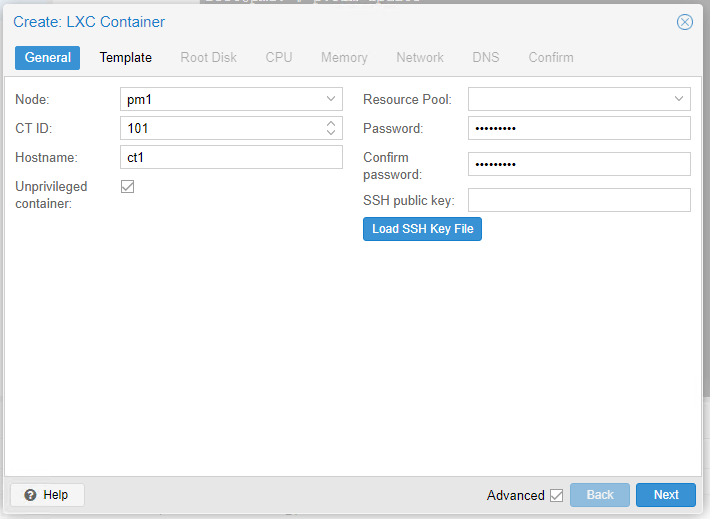
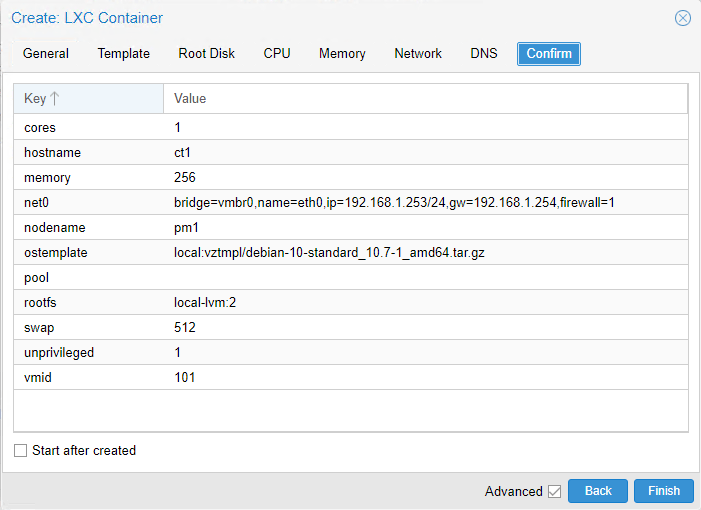
Right-click on the node and then click “Create CT”. Provide a hostname (I chose “ct1” as that’s just my naming convention but perhaps you’ll choose something more descriptive such as “pihole”) and a strong password. Make sure you leave “Unprivileged container” ticked and click “Next”. I’ve seen other people recommending that it be un-ticked but this makes no sense to me, you may as well enjoy the extra security of running Pi-Hole in an unprivileged container.
Proceed through the remaining steps, selecting your preferred template (Debian in my case), disk size, CPU cores, and RAM/Memory.
I’m going with a 2GB disk, 1 CPU core, and 256MB of memory. As I mentioned earlier, Linux Containers are very lightweight, and Pi-Hole doesn’t need many resources so this should be fine. If you’re running Proxmox on a super-computer and you’re in a generous mood, feel free to allocate more.
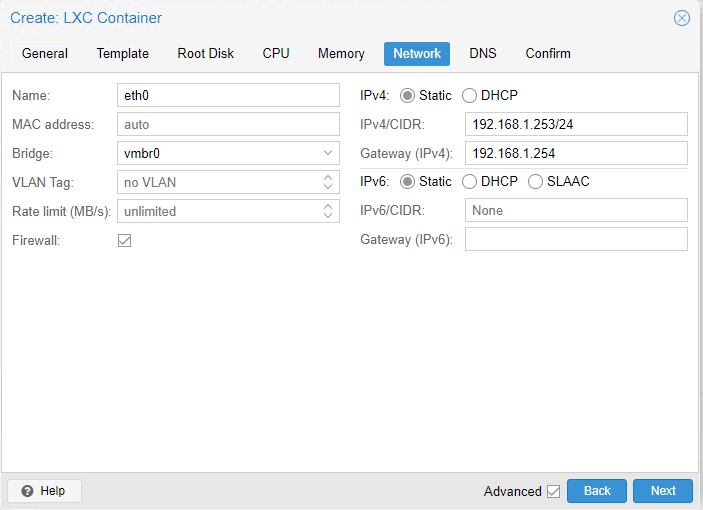
Pi-Hole needs a static IP address (because the other devices on your network will need to point to it). Assign one that makes sense in your environment. For me, I’m going to choose 192.168.1.253. Enter your gateway (192.168.1.254 for me) and click “Next”.
Leave the DNS servers to “use host settings” and click “Next”. During the Pi-Hole installation later, we’ll be selecting the upstream DNS servers separately. If everything looks in order, click “Start after created” and then “Finish”.
Step 2 – Installing Pi-Hole in your new Proxmox Linux Container
Click on your newly created container and then click “Console”.
Login with the username “root” and the password you chose earlier.
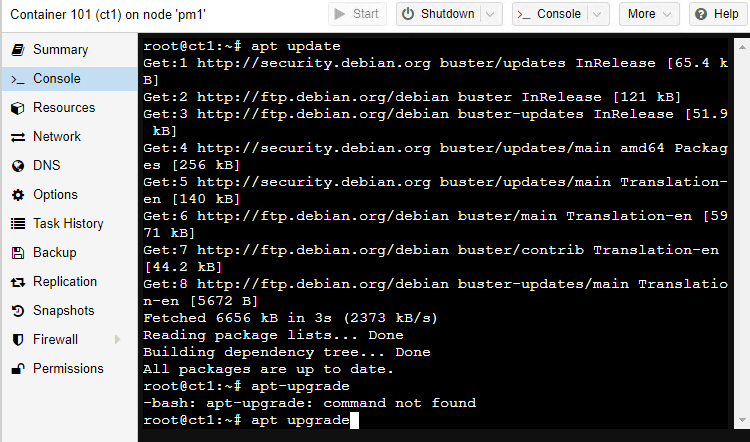
Issue and “apt update” followed by an “apt upgrade” command. This will make sure our new system is up to date and secure.
This step is likely to be somewhat contentious so you can skip over it if you like. I’m going to disable IPv6 on my Pi-Hole system. I know lots of people will argue that you shouldn’t disable IPv6 and that in doing so it can cause stability problems and lead to the world running out of IPv4 addresses. It’s something I always do, however, and on Debian, this is achieved by appending three lines to the end of the /etc/sysctl.conf config file. Type nano /etc/sysctl.conf to open the file in a text editor, page down to the bottom of the file and add these lines:
net.ipv6.conf.all.disable_ipv6 = 1
net.ipv6.conf.default.disable_ipv6 = 1
net.ipv6.conf.lo.disable_ipv6 = 1
Then save and exit (CTRL-O followed by CTRL-X). Then just reboot by typing “reboot”.
The Pi-Hole installer relies on a tool known as “curl”. Curl can be thought of as a downloader, which we’ll have to first install with the apt install curl command
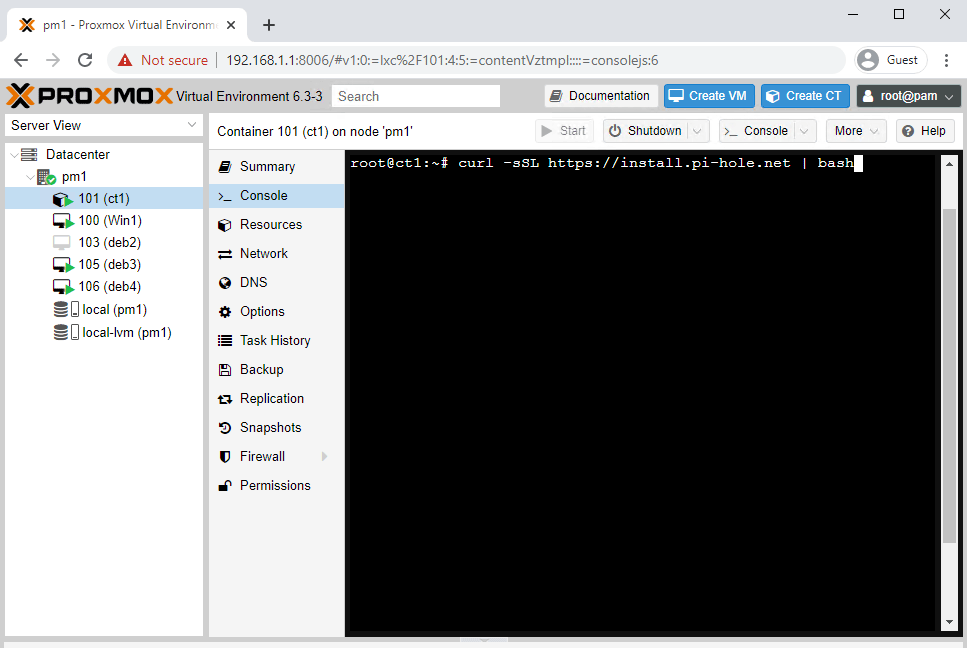
To get the Pi-Hole install underway, type curl -sSL https://install.pi-hole.net | bash this tells Curl to download the installation commands from the Pi-Hole website and pipe them to the Bash shell.
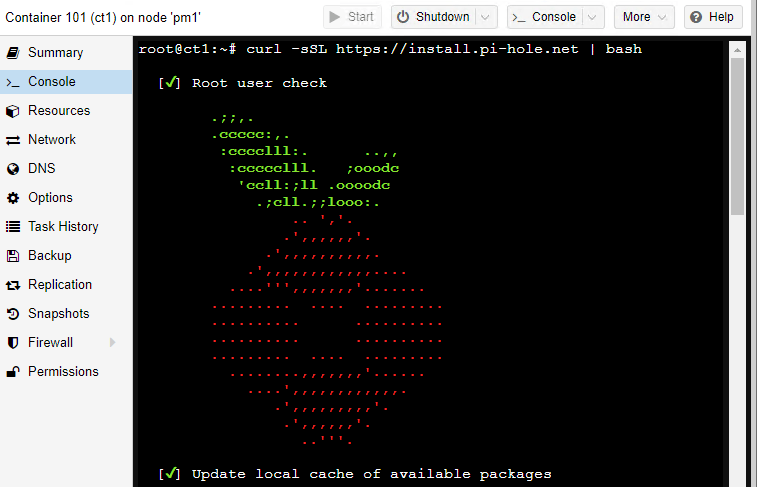
If all goes well, the Pi-Hole installer should perform a few pre-flight checks and then start asking you for some configuration details.
The first choice you need to make is regarding your upstream DNS provider. This is the DNS server that you’d like to use to lookup permitted requests. I like to use Cloudflare as they don’t log your requests to later analyse them for commercial purposes
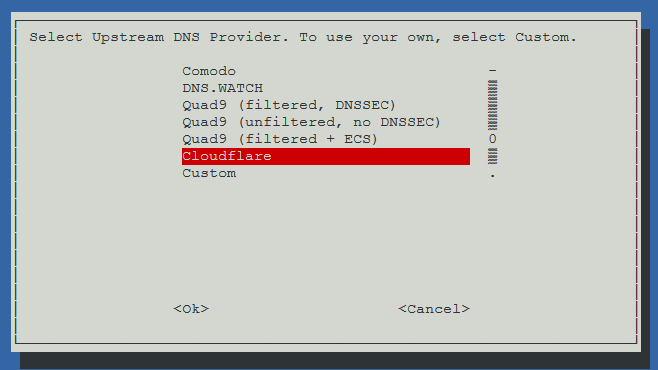
Just for clarity, say, for example, my computer attempts to lookup bbc.com using the Pi-Hole DNS server. Firstly, Pi-Hole will confirm that it’s not on a blacklist, then it makes a request of its own to CloudFlare and passes the resulting IP address back to my computer. This is what is meant by an upstream DNS provider.
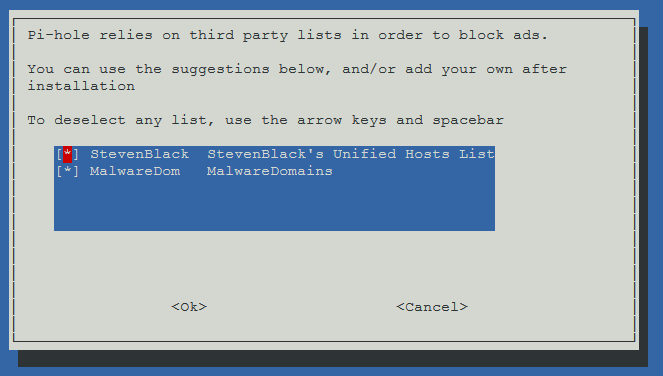
The next step will ask you whether or not to use the default blacklists. I’m going to use both of the defaults for now. We can tweak these later.
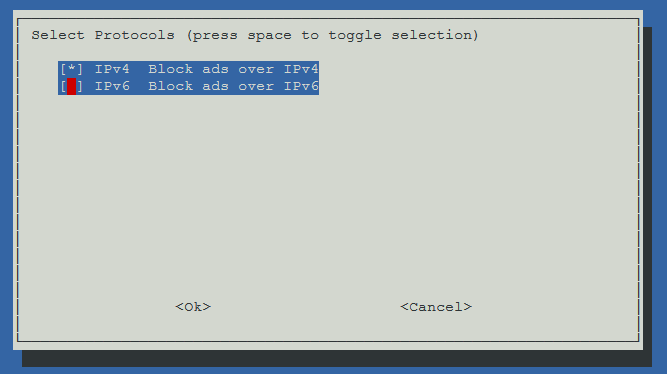
Again, this is potentially contentious but I de-select IPv6 during the next step as I don’t use it on my network. If you do use IPv6 then, by all means, leave it enabled.
The next couple of steps ask you to confirm your static IP address and provide a warning about IP conflicts. Read these and decide if they affect you or not. I just skipped over them because everything was fine.
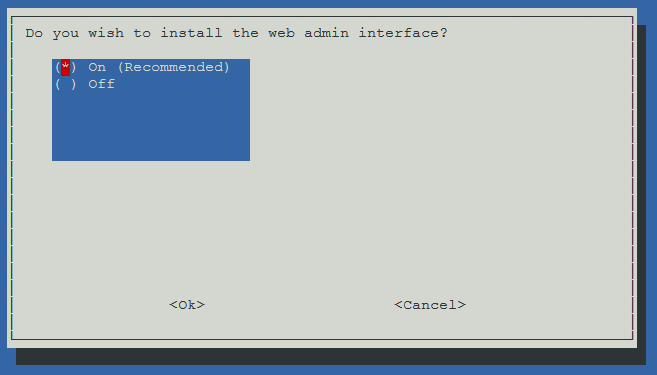
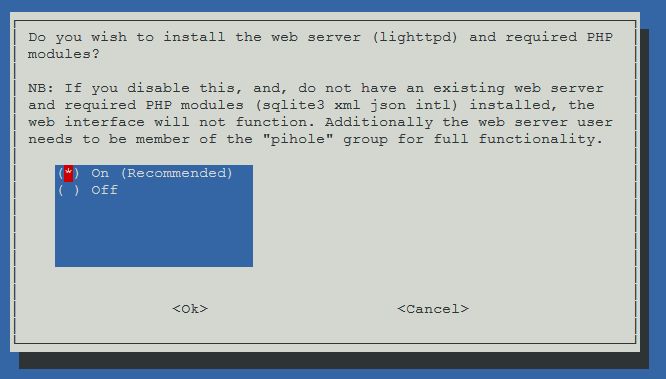
Pi-Hole can be administered through a pretty Web interface, which makes tasks like adding blacklist and whitelist entries very easy. The Web interface requires that Pi-Hole installs a lightweight Web server in the background. I personally want this nice interface so I’m going to select “On” for these next steps. If you’re not familiar with Pi-Hole then I would definitely recommend leaving these selections on, it just makes life so much easier. Of course, if you’re a wizz-kid, command-line-loving, Pi-Hole aficionado, you can ignore my advice.
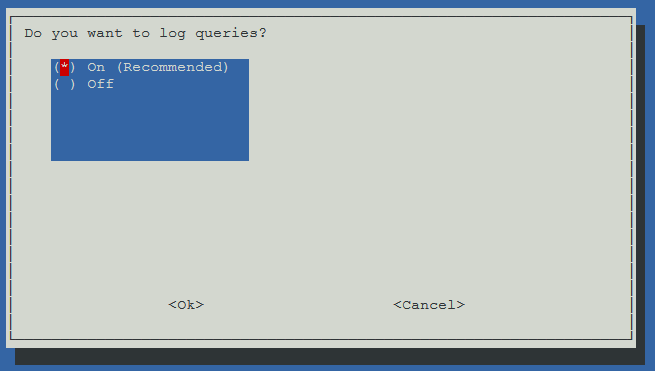
You can choose to enable or disable query logging. I find it useful to have logging enabled. It really helps when you’re trying to work out why certain ads aren’t being blocked. Especially if the ads are within apps rather than Web pages, making the source code difficult to inspect. Earlier when creating the container, I allocated 2GB of disk space because Pi-Hole likes around 1GB, leaving 1GB for log files. Again, make your own decision on this.
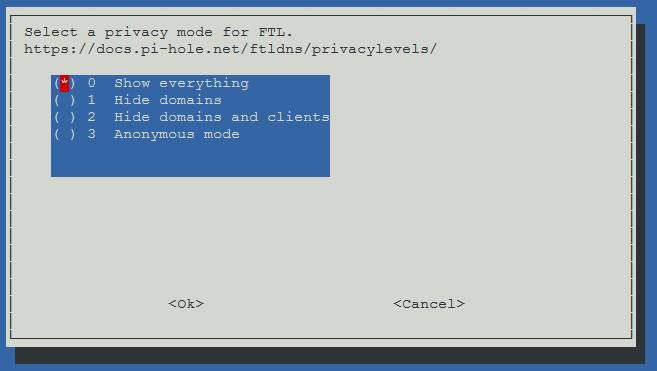
As this server is going to be for personal use, I’m going to set the logging level to “Show everything”. If you have some privacy concerns, you can choose a different level at this point.
You’ll now see the installer downloading any dependencies along with the actual Pi-Hole software from Github. It shouldn’t take too long, around 30 seconds on my machine. Once completed, you’ll be presented with an automatically generated password, make a note of this. Assuming you chose to install the Web interface, you’ll be told the URL of that too.
At this point, I like to change the admin password, simply type pihole -a -p and you’ll be prompted to enter the new password. Just make sure you choose something secure that won’t be easily guessed.

Step 3 – Managing Pi-Hole
Now that the Pi-Hole installation is complete, we can head over to the Web interface to manage the system. The interface can be found at /admin of the IP you chose earlier. For example, it might be http://192.168.1.252/admin/. Once loaded, click “Login” and enter your password.
You can manage the ad blacklists by going to Group Management and Adlists. You’ll find that the two default lists are shown. Of course, you can add more lists but I’ve found the two defaults to be sufficient.
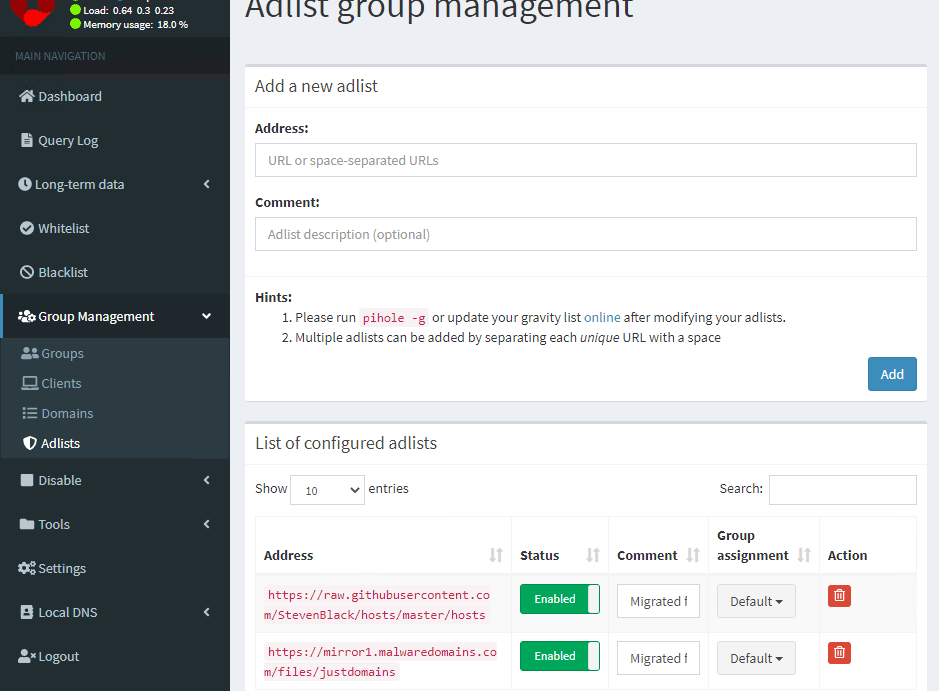
There are various other settings that can be altered but I’ve never found the need to change any of them. Occasionally I’ll add a custom entry to the blacklist but that’s all.
Step 4 – Updating your device’s DNS to use Pi-Hole
Although Pi-Hole is installed and configured, it isn’t actually much use until you point your devices to it. To do this, you need to make sure that the DNS settings of anything you want to be protected from ads are changed. For me, I like to only have certain devices using Pi-Hole rather than everything on the network. For example, I have my Firestick going through Pi-Hole but not my main workstation. I’ll show you a couple of ways to get your devices using Pi-Hole depending on whether or not you want to be selective about which devices can use it.
I want all devices on my network to use Pi-Hole
In this case, I would recommend having your DHCP server assign both the device IP and also the DNS settings. In a home environment, this is likely how things are currently set up. Of course, we now want the DHCP server to assign the IP address of your Pi-Hole server as the DNS server, rather than whatever it currently is. The problem here is that a number of “home” routers that also serve DHCP don’t permit this. They always want to point the DNS back to themselves. In this case, you’re going to want to disable the DHCP server within your router and enable Pi-Hole’s built-in DHCP server. For this example, I’ll show you how that’s achieved using the BT Home Hub as it’s currently the most popular ISP “home” router in the UK. The method is broadly similar for other ISP routers too, including Virgin Media so you should be able to figure it out.
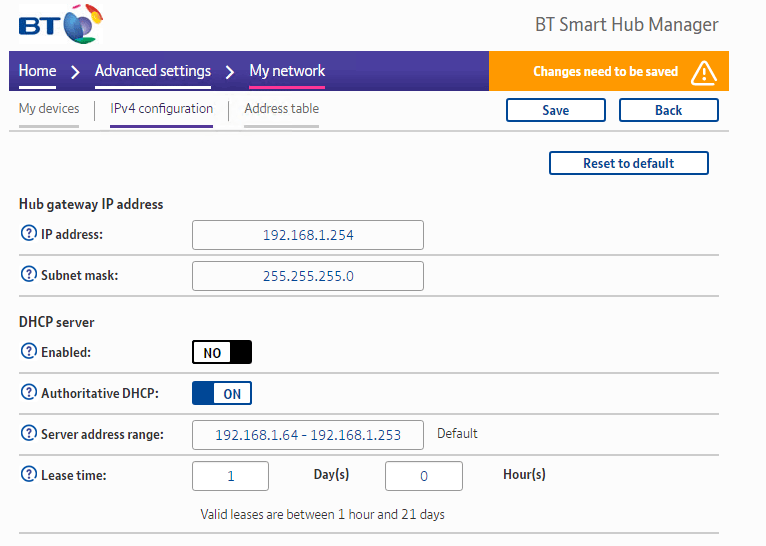
Disable the DHCP server feature on BT Home Hub
Within your Web browser, visit the IP of your Home Hub (default is 192.168.1.254)
Click “Advanced Settings” and them “My Network”
Enter your password and click “OK”
Click “IPv4” configuration
Under the “DHCP Server” section, change “Enabled” to “No”
Enable the DHCP server within Pi-Hole
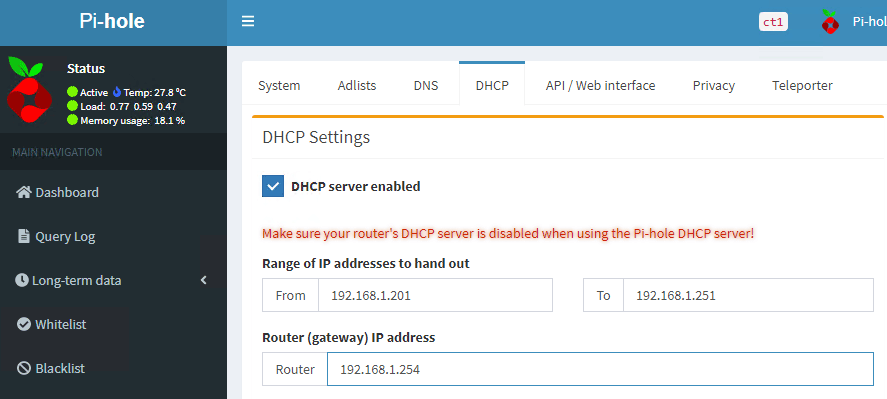
Visit the Web interface of your Pi-Hole instance
Click “Login” and enter your password
Browse to “Settings” and then “DHCP”
Click the box next to “DHCP server enabled”
Make sure the “Router (Gateway) IP Address” is set to your BT Home Hub
Finally, click “Save”.
Devices on your network will slowly begin to use Pi-Hole. How long this will take to happen largely depends on the “Lease Time” value that was previously set on your Home Hub. If you want to speed up the process you can either manually renew the DHCP config on your devices, or simply restart them.
I want only specific devices to use Pi-Hole
If like me, you prefer to control which of your devices use Pi-Hole then you need to do things a little differently. If you have a decent DHCP server (not a “home”/ISP-issued router), you can create DHCP reservations for each of your devices, specifying for each one which DNS server they’ll use. Simply set the DNS server for any device you want to be protected from Ads to use the Pi-Hole server. I won’t talk about this much as if you’ve got a decent setup, you’ll likely already be familiar with DHCP/DNS/Reservations, etc.
If you’ve got a standard “home setup”, for example, a BT Home Hub, then honestly, the easiest solution is just to manually update the DNS settings on any device you want to be protected. To do this, you’ll need to change the configuration from DHCP to Static. Then you’ll need to provide the IP that the device should use, and the IP of the Pi-Hole server as its DNS server. For a Windows 10 PC for example:
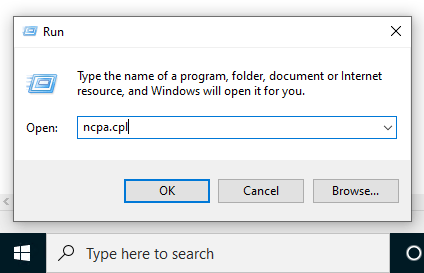
Right-click the Windows start button and click “Run”
Enter “ncpa.cpl” and click “OK”
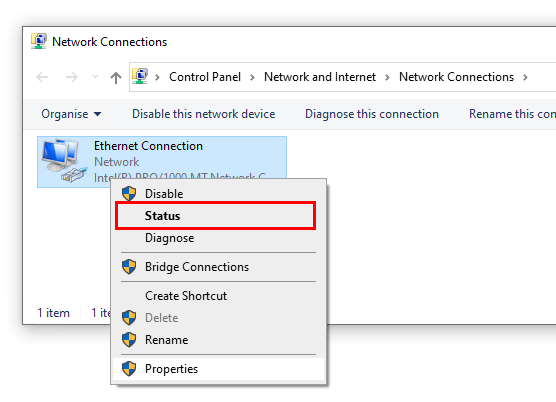
Right-click your network connection and then click “Status”
Click “Details” and make a note of “IPv4 Address”, “IPv4 Subnet Mask”, “IPv4 Default Gateway”
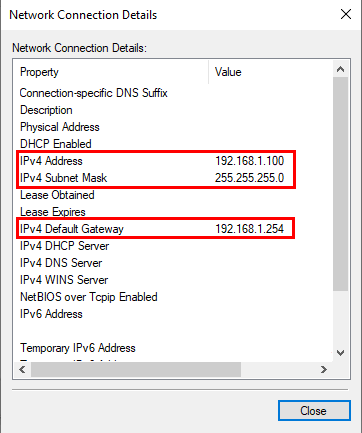
Click “Close” and then “Properties”
Select “Internet Protocol Version 4 (TCP/IPv4)” and click “Properties”
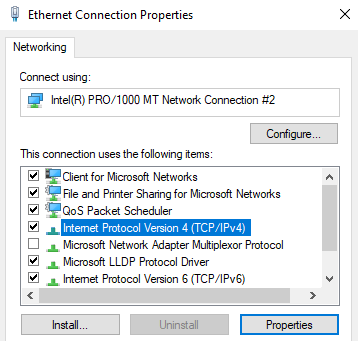
Change the first radio box to “Use the following IP address”
Enter the three corresponding values that you recorded a couple of steps ago
For “Preferred DNS Server”, enter the IP address of your Pi-Hole server
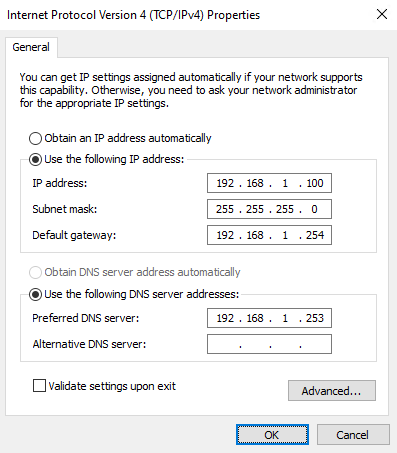
Click “OK” twice and then “Close”
Step 5 – Checking that Pi-Hole is working
Checking that Pi-Hole is blocking ads is easy to do and only takes a minute. Firstly you’ll want to choose a web page that usually has lots of ads and then visit that page with your regular DNS (not Pi-Hole DNS).
For this step, I chose to use dailymail.co.uk. It considered fake-news by some but for our purposes, it’s perfect because it’s usually infested with adverts. As you can see from this image before I switched my DNS over to Pi-Hole, there were seven adverts on the screen at this point (towards the end of an article, above the comments section).

After enabling Pi-Hole and refreshing the page, you can see that the same section of the page now doesn’t have any ads at all. Excellent!

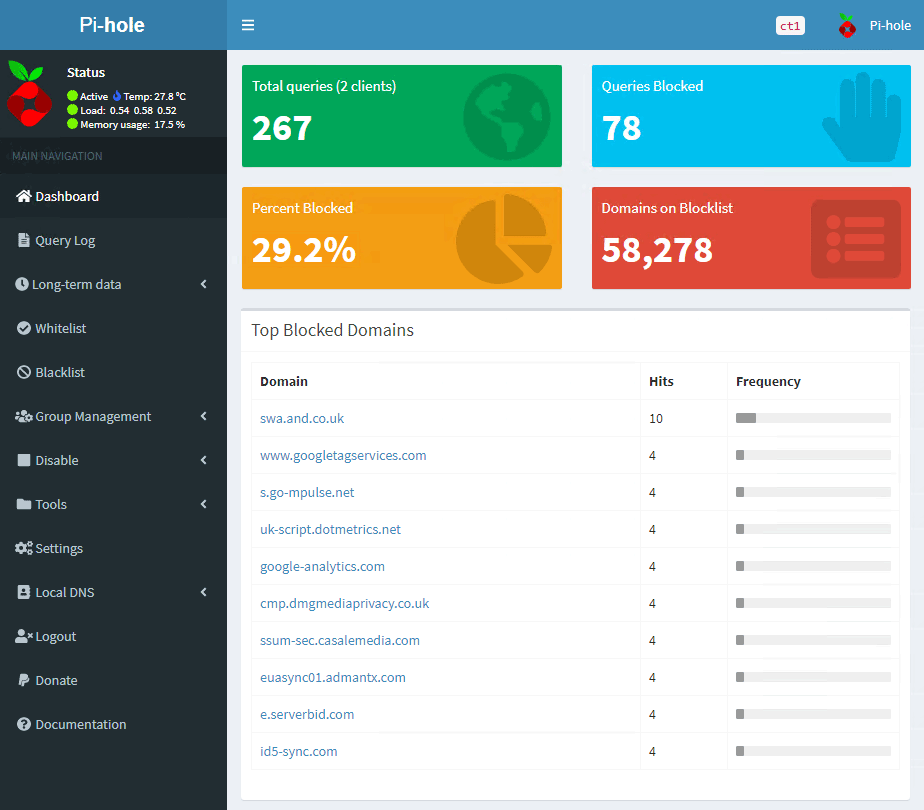
If I head over to the Pi-Hole admin interface, it tells me that it has blocked 78 queries, just from visiting the Daily Mail website. This accounts for over 29% of all DNS queries processed, which is quite astonishing.
Summary
We’ve discussed what Pi-Hole is and what a Linux Container is. We’ve then covered how to install Pi-Hole into a Linux container on Proxmox. After setting it up, we moved onto configuring devices on your network to actually use Pi-Hole as their DNS server. Finally, we performed a simple test to prove that it’s blocking ads as expected. I hope you’ve found this useful and if you haven’t tried Pi-Hole before, I recommend you give it a spin. Aside from blocking ads on websites, I love that I can block the annoying ads on my catchup TV apps like Channel 4’s “4 on-demand” and Channel 5’s “My5”.

WOW !!!
Perfect Guide, all the way !!
Thanks a million.
Thanks for the good and complete guide!
Using Pi-hole on a NUC Celeron and Home Assistant. Works great.
It’s the first tutorial that’s has clear instructions and works on first time, will save me some sleep 🙂
Fantastic help, truly exactly what I needed. And now I have my pihole back in a super easy setup!!!
What an awesome writeup!
Your tutorial was head and shoulders above the few others i read up on for installing Pi-hole on Proxmox.
Would have been nice to know why you believe it was unnecessary to run this as a privileged container.
Thank you very much!! It‘s an easy step by step Tutorial. It‘s the first thing I did on my Proxmox Server and It worked directly.
Best Wishes from Germany
Andreas
Fantabulous!
net.ipv6.conf.all.disable_ipv6 = 1
net.ipv6.conf.default.disable_ipv6 = 1
net.ipv6.conf.lo.disable_ipv6 = 1
Don’t do this if you use DHCP reservation in router. It will break your network connection every few minutes.
Thanks mate, this has helped me a lot to save resources on my server, I was using it on an ubuntu VM with docker, much cleaner this way.
Very well written guide works out great. Thank you for your time in making this its greatly appreciated.
Very nice guide for a new user to Proxmox.
Hello
this step does not work on my proxmox:
curl -sSL https://install.pi-hole.net | bash
it says that the comand was not found.
Can anyone help me please?
Thanks
Hi Héctor,
It sounds like you missed a step and still need to install Curl.
“apt install curl” should do the trick!
Thanks.
Thanks for the guide!
I have one problem, every time I reboot the host or the container, pi-hole is dead.
I have to run the repair command and then it works… any idea on how to fix it?
My setup is on proxmox as well, i run pfsense router os and it give the pi-hole as default DNS, pi-hole upstreams the NS reqs to a VM that runs lancache and that upstreams to 1.1.1.1
Hi George,
I’m not sure. I don’t recall having that issue myself.
If you run “systemctl status pihole-FTL” after booting, that should prove whether or not the issue is the service failing to start.
I’d also check the “/var/log/daemon.log” log file for clues (searching for “pihole-FTL”).
Good luck.
Thanks a lot!
Very detailed and worked at the first try! Thank you a lot!!!
Great guide, worked flawless. Thanks!